Animatronic Slime Project Update #2 - January Progress and February Goals
- Matthew Saenz

- Jan 31
- 7 min read
Welcome back everyone! This past month I selected the silicone rubber to be used for the slime puppets and designed and iterated on the mold design for the puppets.
Ecoflex Testing and Downselection
In order to select the type of silicone rubber I would use for the slime puppets, I purchased and compared the lowest and highest hardness Ecoflex variations available on Amazon, Ecoflex 00-10 and Ecoflex 00-45 Near Clear. I created small test batches of each, producing a 1" diameter, 0.25" thick disk of each material in a 3D printed test mold.


Appearance
One thing that was immediately obvious after drying was that the Ecoflex 00-45 Near Clear was, well, nearly clear. By comparison, the Ecoflex 00-10 is much more opaque, though still somewhat transparent when an object is pressed up against the opposite side. This had the consequence of making the mold lines and air bubbles in silicone much more visible in the 00-45 than in the 00-10, and while I can account for the mold lines by post-processing the 3D printed molds (more on that later), it is difficult to account for air bubbles in the silicone, as I do not have access to a vacuum chamber to draw the air bubbles out of the silicone after mixing. For that reason, the opacity is a point for the 00-10.


Opacity Comparison. Ecoflex 00-10 (left) is much more opaque than Ecoflex 00-45 Near Clear (right).
This difference in opacity also contributed to how LED light interacted with each. Testing with my Arduino, I found that the 00-10 diffused the LED light across the disk more evenly than the 00-45, though both were still concentrated at the location of the LED. Further work will be needed to diffuse the LED light further, but this too is a point in favor of the 00-10.


LED light comparison. Ecoflex 00-10 (left) diffuses the light more evenly than Ecoflex 00-45 Near Clear (right).
I was unable to compare how each silicone would interact with the Silc Pig pigments, as each is highly concentrated with a recommended loading range of .001% to 3% of the total silicone weight, which would be infeasible to measure for a test product this small.
Material Properties
I found the Ecoflex 00-10 to have slightly less mass, and thus less density, than the Ecoflex 00-45. The 00-10 test disk had a mass of 3.4g, giving 00-10 a material density of 1.06 g/ml. The 00-45 test disk had a mass of 3.5g, for a material density of 1.08g/ml, though I acknowledge that precision of these density figures is suspect, given the single decimal point precision of my scale measurements. Therefore, the density should be considered a wash for the two materials.
When comparing the elasticity of each, I found the 00-10 to be more elastic. I was able to stretch the 00-10 disk from an original diameter of 1" to a major axis length of 2.5" (with a minor axis of ~0.5"), a linear strain of 1.5. Comparatively, the 00-45 could only be stretched to a major axis length of 2.25" (with a minor axis of ~0.75"), a linear strain of 1.25. The stretching of these disks was done by hand, and each was stretched until it slipped out of my fingertips, rather than stretched to failure. Assuming a roughly equal stress was applied to each during the stretching, the 00-10 would then have a greater elasticity. This is another point for the 00-10, as the greater elasticity should make the puppets less likely to tear when being inflated, (in the case of the breathing puppets) or lifted (in the case of the jumping puppet.)
As I expressed last month, the tackiness of 00-10 was a concern when comparing the product descriptions, as I feared it would impede the jumping actuation. However, after comparing the two materials, both the 00-10 and the 00-45 felt similarly tacky and neither was disconcertingly sticky. Neither was too tacky to the point that they were difficult to de-mold or handle. The 00-10 was perhaps a bit tackier, but with no empirical way to test, I will call this category another wash.
Results
Winning in three out of five of the comparisons, with the other two being ties, I concluded that the Ecoflex 00-10 is the best material choice for the slime puppets. Its opacity will make it easier to hide imperfections in the puppet mold and silicone while diffusing light more evenly and its elasticity will make it more resistant to tears. These test disks also helped inform the slime puppet design. Originally I had planned for the puppets to have a 0.25" wall thickness, but when handling the disks, I felt that wall thickness would make the puppets too stiff and too heavy. The puppets are now planned to have a 0.125" wall thickness.
Slime Puppet Mold Design
When conceptualizing how to design the mold, I separated the puppet into two parts: the flat bottom, and the dome. Each part would be molded separately then adhered together using more silicone. This would require the creation of three parts: the slime dome mold, the slime bottom mold, and an assembly jig to hold the two parts together while the "gluing" silicone sets.
Slime Dome Mold
I designed this mold in two parts, the bottom piece which would hold the interior shape of the dome, and the top piece which forms the exterior surface. This design also included alignment holes on each corner and a single hole to pour the silicone into. It took a couple iterations to get this right.
Originally, I designed the mold to fit the 6" diameter, 4" height sketch I had made for the terrarium CAD sketch, but after slicing the file and going to print, I realized this would be way too big to print in a reasonable time. From there I scaled the slime by two-thirds for a 4" diameter, 3" height dome. After printing the first iteration, I realized that the tolerance on the alignment holes was too tight, resulting in the two parts of the mold being inseparable after connecting.

With this failure, I adjusted the tolerancing on the alignment holes from 0.2mm clearance to 1.0mm clearance. With this, the two mold parts were able to be easily connected and separated, with only a slight bit of friction between the bottom mold's dome and the top mold's hole!
Wait a minute, there's going to be silicone there. How will I open the mold and retrieve the slime dome after it sets?

After testing the second version of the dome mold, I realized my mistake. By separating the two pieces at the base of the dome mold beneath the widest point of the dome, I created a choke-point that would complicate removing the slime dome from the mold. In the latest revision of the dome mold, it is separated at the widest point of the dome. I hope to begin printing this early next week.

Here I will also note that difficulties with FreeCAD's union tool during the design of the slime dome mold resulted in me switching to the more Solidworks-esque Onshape for the remainder of the project.
Slime Bottom Mold
The slime bottom mold is comparatively much simpler than the slime dome mold, being essentially a single flat disk the silicone will be poured into. There are two variants of the bottom mold, one with a hole to align the silicone tubing to be used with the water pumping for the breathing slimes, and one flat mold for the jumping slime.

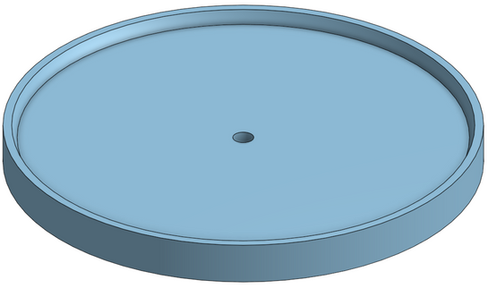


Slime Bottom Molds for the Breathing Slimes (left) and the Jumping Slime (right).
Slime Assembly Jig
To assemble the slime puppets, I designed a "basket" to hold them in place while the silicone "glue" sets. It supports the puppet from the bottom and sides, while still allowing access to the seam between the dome and bottom to apply the silicone.

Mold Post-Processing
As I mentioned above, the visibility of the print lines in the test disks illustrates the need to post-process the molds after 3D printing. From research online, I've found that you can use plastic cement, a solvent based adhesive that is typically used in model building, to melt away the mold lines in PLA, smoothing the print. Additionally, I will use fine grit sandpaper to finish the molds.
January Progress Evaluation and February Goals
Overall, I did not get quite as far this month as I had hoped. As stated in my last post, my goals for this month were to compare and select the silicone to be used for the puppets, to design the slime puppet molds, and to begin testing on the puppet manufacturing. Due to the difficulties encountered when designing the slime dome mold, I was unable to complete the mold in time to cast a slime puppet prototype by the end of the month. With the dome mold design now fully resolved, I anticipate being able to do so by next weekend.
My first goal for February will be to complete assembly of a slime puppet. This will involve printing and post-processing the molds, casting the dome and bottom to a puppet, and "siliconing" it together. This should reveal any flaws in the mold design or manufacturing process which will require redesigns.
My second goal for February will be to select a semi-solid filler material for the jumping slime. For the breathing slimes, I still plan to use water to inflate and deflate the slime domes, but a solid material would be preferable for the jumping slime, as the filler material will not be able to be circulated in and out of the jumping slime like the water in the breathing slimes.
My final goal for February will be to resolve how the fishing line will be passed through the slime, whether this be through piercing the dome, or redesigning the dome mold to create a hole at the top of the dome.

Comments